Getting started with Crossbar.io
Crossbar.io is an open source networking platform for distributed and microservice applications. It is a feature rich, scalable, robust and secure implementation of the open Web Application Messaging Protocol (WAMP).
What is WAMP?
WAMP is a routed protocol, with all components connecting to a WAMP Router, where the WAMP Router performs message routing between the WAMP client. WAMP provides two messaging patterns:
Publish & Subscribe
Routed Remote Procedure Calls
WAMP is a WebSocket sub-protocol, which means that you can communicate with browser using it. In addition to that it can also run over any transport which is message-oriented, ordered, reliable, and bi-directional such as TCP, Unix domain socket, etc.
Introduction
Crossbar.io is a WAMP router with advanced features implemented in the Python language. It is agnostic to the implementation of the client or its deployment. The below overview shows WAMP clients in different languages communicating with each other.

WAMP Clients
The team behind Crossbar.io also maintains a set of WAMP clients as part of the Autobahn project.
Apart from that there are also numerous third-party implementations of WAMP clients in different languages.
Note
A qualified WAMP client with basic profile should be able to do the following things
Subscribe to a topic (eg: com.myapp.hello)
Publish to a topic
Register a procedure (eg: com.myapp.date)
Call a procedure
Prerequisite
For following this guide some (very) basic knowledge of Python, Javascript, Linux and Docker commands is useful.
What’s in this guide
This guide will show you how to start the Crossbar.io router and some basic application components using Docker containers. We will cover communication between both Python and JavaScript components to show you the basics of how Crossbar.io is used. Although Docker is not necessary to run Crossbar.io, or to develop WAMP applications, it is the quickest way to get the necessary components for developing WAMP applications using Crossbar.io up and running.
Basic Concept:
The Crossbar.io is a multi process architecture. A single instance of Crossbar.io is called Crossbar.io node. When a Crossbar.io node starts, initially it starts a single process called node controller.

Node Controller:
The node controller is the master process of everything. The node controller reads the configuration file locally and starts multiple worker processes such as router, containers and guest workers.
Routers are the core facilities responsible for routing WAMP messages.
Containers are Autobahn Python clients which runs natively as part of Crossbar.io.
Guests are applications other than routers and containers ,e.g. a nodejs application etc.
The node reads the configuration file locally and starts the workers according to it.
Configuration:
{
    "version": 2,
   "controller": { },
   "workers": [
         "-- configuration work is done here --"
   ]
}
Above is an example of a bare minimum config.json. Here if present, controller must be a dictionary and workers, if present must be a list of dictionaries. Each entry of dictionary in the worker is a worker process. It is defined by its type as router or container or guest. The node controller can run multiple routers, components and guest workers, For example If there are three routers then there will be three dictionary entries within the worker section with the type router. a detailed explanation of the configuration is explained in the upcoming section.
Router:
Routers are the core facilities of Crossbar.io, responsible for routing WAMP remote procedure calls between Callers and Callees, as well as routing WAMP publish-subscribe events between Publishers and Subscribers. To start a router the following things needs to be defined.
Realm
Transport

Realm
A realm is equivalent to a namespace. Crossbar.io uses realms as domains for separation of routing and administration. The router needs to provide at least one realm for applications to communicate through. A realm can be optionally protected by authentication and authorization. The access control of the topics and procedures within a particular realm is defined by roles. The roles define permissions to allow,deny or authorize access to topics and procedures.
Note
Every WAMP session between Crossbar.io and a Client is always attached to a specific Realm. It is not possible for a client connected in a particular realm to see clients of other realm.
Roles
Roles defines the permissions for WAMP clients of a given realm, to use an URI(topic or procedure). It is possible to define a common rule for all URIs and specific rules for some particular URIs. The rules allow or disallow action such as publish, subscribe, call and register. These rules can be defined by a static authorization or a dynamic authorization. In dynamic authorization, the router calls a component (Python client) and the component performs authorization.
Note
Authentication with Crossbar.io determines if a WAMP Client is allowed to connect and which identity it is assigned, while authorization determines which permissions a Client is granted for specific actions based on its identity.
Transport:
Transports are necessary for allowing incoming connections to Routers. Crossbar.io provides WebSocket and RawSocket Transport. The transport run over transport endpoint and Crossbar.io supports the following transport endpoints: TCP, TLS, Tor and Unix Domain Socket. Unless specified the port number of the listening port is 80 and incase of TLS it is 443. In addition to that there is Web transport which serves the purpose of web service, WSGI, redirection, file upload or CGI etc.
Installing Docker
Firstly Docker needs to be installed on your machine. The official Docker site provides instructions on how to get Docker running in your respective operating system at https://docs.docker.com/install/.
Note
All the examples here have been tested on Ubuntu 18.04 LTS using Docker, with commands for *nix shell, but work on other platforms with adaptation.
For other methods of installation refer to the Installation Guide.
Example Code
The example code that we are going to use here is available at Crossbar Examples. There are plenty of examples there in the repository; we are going to use the getting-started.
Fetch the source code using git:
git clone https://github.com/crossbario/crossbar-examples
cd crossbar-examples/getting-started
find .
.
./1.hello-world
./1.hello-world/client_component_publish.py
./1.hello-world/client_appsession_publish.py
./1.hello-world/client_appsession_subscribe.py
./1.hello-world/client_component_subscribe.py
./2.pubsub-js
./2.pubsub-js/frontend.html
./2.pubsub-js/autobahn.min.js
./2.pubsub-js/backend.html
./2.pubsub-js/backend.js
./2.pubsub-js/frontend.js
./3.rpc
./3.rpc/client_appsession_rpc_callee.py
./3.rpc/client_component_rpc_caller.py
./3.rpc/autobahn.min.js
./3.rpc/client_appsession_rpc_caller.py
./3.rpc/rpc_callee.html
./3.rpc/rpc_callee.js
./3.rpc/run
./3.rpc/client_component_rpc_callee.py
./4.nodejs
./4.nodejs/client.js
./4.nodejs/run
./4.nodejs/README.txt
./4.nodejs/package.json
./.crossbar
./.crossbar/config.json
All the examples used here are started from getting-started folder, so before running any command navigate to the folder if you have not:
cd crossbar-examples/getting-started
Starting a Crossbar.io Router
The Crossbar.io instance can be started with Docker using the below command:
docker run -v $PWD:/node -u 0 --rm --name=crossbar -it -p 8080:8080 crossbario/crossbar
Note
The -p 8080:8080 argument exposes and maps the port inside the container to the local machine. The option -v $PWD:/node mounts the getting-started folder of the host to the /node of the docker container. The getting-started folder contains the configuration file at .crossbar/config.json, The Crossbar.io will find it at /node and boots using it. This makes it easy to edit the config json locally and start it in Docker.
If all is good, you should see the output similar to the below:
 [Controller      1]
 [Controller      1]     :::::::::::::::::
 [Controller      1]           :::::          _____                      __
 [Controller      1]     :::::   :   :::::   / ___/____ ___   ___  ___  / /  ___ _ ____
 [Controller      1]     :::::::   :::::::  / /__ / __// _ \ (_-< (_-< / _ \/ _ `// __/
 [Controller      1]     :::::   :   :::::  \___//_/   \___//___//___//_.__/\_,_//_/
 [Controller      1]           :::::
 [Controller      1]     :::::::::::::::::   Crossbar v18.7.2
 [Controller      1]
 [Controller      1]     Copyright (c) 2013-2018 Crossbar.io Technologies GmbH, licensed under AGPL 3.0.
 [Controller      1]
 [Controller      1] Initializing <class 'crossbar.personality.Personality'> node from node directory "/node/.crossbar"
 [Controller      1] New node key pair generated!
 [Controller      1] File permissions on node private key fixed
 [Controller      1] Node key loaded from "/node/.crossbar/key.priv"
 [Controller      1] Node configuration loaded from "/node/.crossbar/config.json"
 [Controller      1] Entering event reactor ...
 [Controller      1] Starting standalone node
 [Controller      1] Node ID "983fa84fda45" set from hostname
 [Controller      1] No extra node router roles
 [Controller      1] RouterServiceAgent ready (realm_name="crossbar", on_ready=None)
 [Controller      1] Registered 21 procedures
 [Controller      1] Signal handler installed on process 1 thread 140562874563464
 [Controller      1] Using default node shutdown triggers ['shutdown_on_worker_exit']
 [Controller      1] Booting node
 [Controller      1] Configuring node from local configuration
 [Controller      1] Starting 1 workers ...
 [Controller      1] Starting router worker "worker-001"
 [Controller      1] Starting new managed worker process for Router worker "worker-001"
 [Router         13] Starting worker "worker-001" for node "983fa84fda45" with personality "standalone"
 [Router         13] Running as PID 13 on CPython-EPollReactor
 [Router         13] Entering event reactor ...
 [Router         13] Router worker session for "worker-001" joined realm "crossbar" on node router
 [Router         13] Registered 41 procedures
 [Router         13] Router worker session for "worker-001" ready
 [Controller      1] Router worker "worker-001" process 13 started
 [Router         13] Starting router realm "realm-001"
 [Router         13] RouterServiceAgent ready (realm_name="realm1", on_ready=<Deferred at 0x7f380ef4a6d8>)
 [Router         13] Realm "realm-001" (name="realm1") started
 [Controller      1] Router "worker-001": realm 'realm-001' (named 'realm1') started
 [Router         13] Starting role "role-001" on realm "realm-001"
 [Router         13] role role-001 on realm realm-001 started
 [Controller      1] Router "worker-001": role 'role-001' (named 'anonymous') started on realm 'realm-001'
 [Router         13] Starting router transport "transport-001"
 [Router         13] Creating router transport for "transport-001"
 [Router         13] Router transport created for "transport-001"
 [Router         13] UniSocketServerFactory starting on 8080
 [Controller      1] Router "worker-001": transport 'transport-001' started
 [Router         13] Starting "nodeinfo" Web service on path "info" of transport "transport-001"
 [Controller      1] Router "worker-001": web service 'nodeinfo' started on path 'info' on transport 'transport-001'
 [Controller      1] Local node configuration applied successfully!
Viewing Crossbar Status in a Browser
Open your favorite browser and navigate to the address http://localhost:8080/info. This should give the below output.
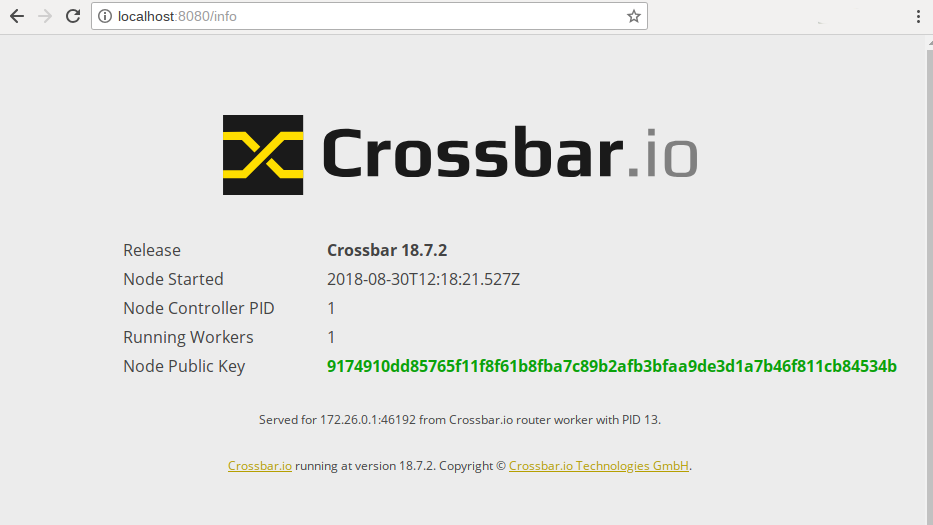
If the Crossbar.io runs as expected - Congratulations! The first step towards building your next IOT application is done successfully.
Crossbar configuration
The Crossbar configuration file is defined using a JSON or a YAML formatted file. The configuration by default will be loaded from CBDIR/config.json or CBDIR/config.yaml. We will be covering in detail about the configuration in the advanced topics. As of now we will see the basic usage here. Now lets have a look at the config.json of the Docker image that we are running.
Note
You can also copy the config.json from running Docker using the command $ docker cp crossbar:/node/.crossbar/config.json . But it is not required since we are mounting the host folder to docker we can access the config.json directly.
crossbar-examples/getting-started/.crossbar/config.json:
 1{
 2    "version": 2,
 3    "controller": {},
 4    "workers": [
 5        {
 6            "type": "router",
 7            "realms": [
 8                {
 9                    "name": "realm1",
10                    "roles": [
11                        {
12                            "name": "anonymous",
13                            "permissions": [
14                                {
15                                    "uri": "",
16                                    "match": "prefix",
17                                    "allow": {
18                                        "call": true,
19                                        "register": true,
20                                        "publish": true,
21                                        "subscribe": true
22                                    },
23                                    "disclose": {
24                                        "caller": false,
25                                        "publisher": false
26                                    },
27                                    "cache": true
28                                }
29                            ]
30                        }
31                    ]
32                }
33            ],
34            "transports": [
35                {
36                    "type": "web",
37                    "endpoint": {
38                        "type": "tcp",
39                        "port": 8080
40                    },
41                    "paths": {
42                        "/": {
43                            "type": "static",
44                            "directory": "../web",
45                            "options": {
46                                "enable_directory_listing": true
47                            }
48                        },
49                     "info": {
50                                "type": "nodeinfo"
51                        },
52                        "ws": {
53                            "type": "websocket"
54                        }
55                    }
56                }
57            ]
58        }
59    ]
60}
The configuration file contains a single router under worker section. The router contains one realm entry and a transport entry. The realm section is between line 9 - 35. EXP
The configuration entries are explained below in Line no - Description format.
7 - defines the worker to the type router.
10 - defines the realm name as realm1
11-30 - a single roles dictionary entry
19-22 - permits to perform publish, subscribe, call and register operation in this realm
Note
The above permission setting should only be used for development purpose and not for production
35-63 - transport dictionary entry.
36-38 - defines the type web. It is a type of transport where it allows websocket, web services to use the same port. The Crossbar.io identifies the packet using its header.
38-41 - it uses tcp and port number 8080 as its transport endpoint
49-61 - defines the web transport entry. each entry in the path defines a route to HTML page.
59 - This entry creates the nodeinfo page http://localhost:8080/info which was verified earlier.
In the configuration you can see the line “name”: “realm1” which configures the realm to be “realm1”. An the port number is configured as 8080 “port”: 8080. When connecting to this Crossbar router instance we need to use this particular realm and port number.
Note
The config file used in the example is also available here.
For more detail about the configuration and features have a look at Administrative manual
Hello World
Our Hello World application consist of three components:
Crossbar.io Router
Autobahn Python Publishing Client
Autobahn JavaScript Subscriber Client

In this example we will be using the Crossbar.io running in the Docker instance. Both the publisher and subscriber client will connect to Crossbar.io using the realm and the port number as mentioned in the configuration file. Once connected the publisher client will publish the string “Hello world” along with a count to the topic “com.myapp.hello”. The subscriber client will listen to the topic “com.myapp.hello” and exits after receiving 5 events.
Publishing Client
The Docker image is started with client_component_publish.py as its application along with the URL and realm passed as environment variable. Here in the URL the IP address points to the linked container name.
docker run -v $PWD:/app -e CBURL="ws://crossbar:8080/ws" -e CBREALM="realm1" --link=crossbar --rm -it crossbario/autobahn-python:cpy3 python /app/1.hello-world/client_component_publish.py
Note
The option -v $PWD:/app mounts the getting-started folder of the host to the /app of the docker container. This makes the python script located in host, accessible in docker container.
Use the same realm value as in the crossbar router. Supplying a wrong realm will disconnect the client.
1.hello-world/client_component_publish.py:
 1from autobahn.twisted.component import Component, run
 2from autobahn.twisted.util import sleep
 3from twisted.internet.defer import inlineCallbacks
 4import os
 5import argparse
 6import six
 7
 8url = os.environ.get('CBURL', u'ws://localhost:8080/ws')
 9realmv = os.environ.get('CBREALM', u'realm1')
10print(url, realmv)
11component = Component(transports=url, realm=realmv)
12
13@component.on_join
14@inlineCallbacks
15def joined(session, details):
16    print("session ready")
17    counter = 0
18    while True:
19        # publish() only returns a Deferred if we asked for an acknowledgement
20        session.publish(u'com.myapp.hello', "Hello World {}".format(counter))
21        counter += 1
22        yield sleep(1)
23
24if __name__ == "__main__":
25    run([component])
The Autobahn Python project supports two APIs: Appsession (inheritance based) and Component. All the examples displayed here are based on the Component API. In the crossbar-examples/getting-started repository, examples of both the type (Appsession and Component) are available, it can be identified with filename containing component or appsession in it. Apart from that the Autobahn Python support two asynchronous frameworks twisted and asyncio. The current example is twisted based.
The Python code client_component_publish.py reads the URL and the realm from the environmental variable and stores them in the local variable. Using the URL and realm the client connects to the Crossbar.io which is listening in the localhost at port 8080 with the single given realm realm1. When client successfully gets connected to the Crossbar.io, a session is created and then the callback function joined is notified. Using the session it is now possible to publish, subscribe, call or register a call. This example just publishes using the api publish as shown below.
session.publish(u'com.myapp.hello', 'Hello World {}'.format(counter))
Note
The WAMP supports following data types in serialization integer, string, bool, list, dict. Please see the specification for more details.
Subscriber Client from Browser
Now that we have tried a Python communication, its time to gets internetized and try the subscriber client example using browser with Autobahn Javascript example. For that firstly we need to ensure that the browser is capable of websocket connection. This can be tested using the https://caniuse.com/#search=websocket.
The Javascript example code is available in the crossbar-examples/getting-started/2.pubsub-js/ folder.
Note
The Javascript examples can be run directly from browser by clicking .html file.
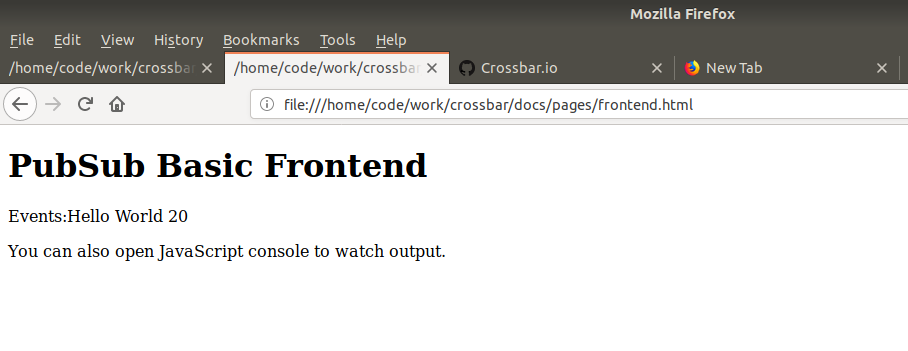
To start the application, just open the frontend.html file using the browser then it will start receiving events
As you can see in the source, inclusion of autobahn.min.js loads the Autobahn Javascript file to the browser, and the next line loads the frontend.js which contains our event receiving application. The label with id “WAMPEvent” is a placeholder where the text will get updated by the code in the frontend.js.
2.pubsub-js/frontend.html:
 1<!DOCTYPE html>
 2<html>
 3   <body>
 4      <h1>PubSub Basic Frontend</h1>
 5      <label id="WAMPEvent">Waiting for Events</label>
 6      <p>You can also open JavaScript console to watch output.</p>
 7      <script src="autobahn.min.js"></script>
 8      <script src="frontend.js"></script>
 9   </body>
10</html>
2.pubsub-js/frontend.js:
 1try {
 2   var autobahn = require('autobahn');
 3} catch (e) {
 4   // when running in browser, AutobahnJS will
 5   // be included without a module system
 6}
 7
 8var connection = new autobahn.Connection({
 9   url: 'ws://127.0.0.1:8080/ws',
10   realm: 'realm1'}
11);
12
13connection.onopen = function (session) {
14
15   function onevent1(args) {
16      console.log("Got event:", args[0]);
17      document.getElementById('WAMPEvent').innerHTML = "Events:"+ args[0];
18   }
19
20   session.subscribe('com.myapp.hello', onevent1);
21};
22
23connection.open();
The connection.open creates a new connection to the Crossbar.io using the give URL and realm. When a session is successfully created the onopen function is called back, where the onevent1 function is subscribed to the topic com.myapp.hello.
Each time an event arrives to the topic com.myapp.hello, the function onevent1 is called, which updates the label WAMPEvent to display in the browser
session.subscribe('com.myapp.hello', onevent1);
The output
Mixing it together
Lets experience the power of WAMP’s language agnosticism by publishing/subscribing to a topic both from Python and Javascript simultaneously.

Please try the above example on your own.
NodeJS Example
The NodeJS example publishes “Hello World” to the topic “com.myapp.hello” and quits. This is not a full blown application but just an example to provide an outlook of a Nodejs application. Please try the example on your own.
docker run -v 4.nodejs:/app -e CBURL="ws://crossbar.io:8080/ws" -e CBREALM="realm1" crossbario/autobahn-js
Moving on we will cover the next important feature of the Crossbar - Remote Procedude Calls.
RPC Example
Here a WAMP client will register a subroutine (i.e. a function) to a particular topic - to be called by some other client; hence it is called Callee. The Caller client can use the topic and call the remote procedure.
The Callee client will implement the date procedure and register it to the topic com.myapp.date, the Caller can call the date function to know the date of that particular client.

RPC Date Callee
We will be using Autobahn JavaScript based RPC Callee client. You can run this script in browser or as nodejs application,we will cover both the methods.The example code is available in the crossbar-examples/getting-started/3.rpc/ folder.
Browser
To start the application, just open the rpc_callee.html file using the browser. The output gets printed in the JavaScript console. In order to view the console,right-click in the workspace of the browser and select Inspect and you can find the console tab.
The script will register a procedure named com.myapp.date.
NodeJS
docker run -v $PWD/3.rpc:/app -e CBURL="ws://crossbar:8080/ws" -e CBREALM="realm1" --link=crossbar --rm -it crossbario/autobahn-js
Source code
3.rpc/rpc_callee.html:
1<!DOCTYPE html>
2<html>
3   <body>
4      <h1>RPC Date Callee</h1>
5      <p>You should open JavaScript console to watch output.</p>
6      <script src="autobahn.min.js"></script>
7      <script src="rpc_callee.js"></script>
8   </body>
9</html>
3.rpc/rpc_callee.js:
 1var isBrowser = false;
 2
 3try {
 4    var autobahn = require('autobahn');
 5} catch (e) {
 6    isBrowser = true;
 7}
 8console.log("Running AutobahnJS " + autobahn.version);
 9
10if (isBrowser) {
11    url = 'ws://127.0.0.1:8080/ws';
12    realm = 'realm1';
13}
14else {
15    url = process.env.CBURL;
16    realm = process.env.CBREALM;
17}
18
19var connection = new autobahn.Connection({ url: url, realm: realm });
20
21connection.onopen = function (session, details) {
22    console.log("session open!", details);
23
24    function utcnow() {
25        console.log("Someone is calling com.myapp.date");
26        now = new Date();
27        return now.toISOString();
28    }
29
30    session.register('com.myapp.date', utcnow).then(
31        function (registration) {
32            console.log("Procedure registered:", registration.id);
33        },
34        function (error) {
35            console.log("Registration failed:", error);
36        }
37    );
38};
39
40connection.onclose = function (reason, details) {
41    console.log("session closed: " + reason, details);
42}
43
44connection.open();
As explained in the previous examples, the boiler plate code is the same here. When a session is created between Crossbar.io and client, the onopen function is called. Here the function utcnow is registered as a time service procedure with URI com.myapp.date.When the caller calls, the result of utcnow is sent back.
session.register('com.myapp.date', utcnow)
RPC Date Caller
Now lets start Caller:
docker run -e CBURL="ws://crossbar:8080/ws" -e CBREALM="realm1" --link=crossbar --rm -it crossbario/autobahn-python:cpy3 python client_component_rpc_caller.py
3.rpc/client_component_rpc_caller.py:
 1from autobahn.twisted.component import Component, run
 2from autobahn.twisted.util import sleep
 3from twisted.internet.defer import inlineCallbacks
 4import os
 5import argparse
 6import six
 7import datetime
 8
 9url = os.environ.get('CBURL', u'ws://localhost:8080/ws')
10realmv = os.environ.get('CBREALM', u'realm1')
11print(url, realmv)
12component = Component(transports=url, realm=realmv)
13
14@component.on_join
15@inlineCallbacks
16def joined(session, details):
17    print("session ready")
18    try:
19        res = yield session.call(u'com.myapp.date')
20        print("\ncall result: {}\n".format(res))
21    except Exception as e:
22        print("call error: {0}".format(e))
23    yield session.leave()
24
25
26if __name__ == "__main__":
27    run([component])
Leaving the boiler place code, we can see that the application calls the remote procedure com.myapp.date and prints the output.
res = yield session.call(u'com.myapp.date')
And the output is:
2018-08-31T05:40:20+0000 call result: 2018-08-31T05:40:20Z
Note
It is not possible to register the same RPC twice, unless you explicitly allow Shared Registrations.
So far we covered the pubsub example using python and javascript and RPC using python. You can also try to run RPC using Javascript. For other examples refer to Crossbar Examples.
Modifying Things
The containers as-is are there to demonstrate the principles. To develop your own applications, you need to modify the code they run as well as the Crossbar.io config file. The application components are in the /app directory of Autobahn Python Docker x86_64 , armhf, aarch64 . The Crossbar.io configuration file is in the .crossbar subdirectory.
Further Materials
Creating Docker Images
Overview of WAMP Client libraries
